2. Debian搭建邮件服务器
2.1. 准备工作
你需要提前安装好Debian。下面将列出配置过程。(注:以下$开头的shell命令表示在一般用户下运行,而#开头的则表示要在root用户下运行)
2.2. 配置postfix和sasl认证
参考 https://blog.csdn.net/zubin006/article/details/2311619
安装postfix和cyrus-sasl软件包
1# apt install sasl2-bin libsasl2-modules postfix
安装postfix时会出现向导,只需将所有选项设置为默认即可。 安装后,修改/etc/default/saslauthd,设定START=yes:
1This needs to be uncommented before saslauthd will be run automatically
2START=yes
3
4# You must specify the authentication mechanisms you wish to use.
5…
修改/etc/postfix/sasl/smtpd.conf,设定postfix使用saslauthd:
1# mkdir -p /etc/postfix/sasl
2# echo "pwcheck_method: saslauthd" > /etc/postfix/sasl/smtpd.conf
将postfix加入sasl群组中:
1# /usr/sbin/addgroup postfix sasl
在/etc/postfix/main.cf末尾添加这些配置(直接用vi或者nano修改文件),使其使用 SMTP AUTH 及 SASL Authenticate:
1smtpd_sasl_auth_enable = yes
2broken_sasl_auth_clients = yes
3smtpd_sasl_security_options = noanonymous
4smtpd_recipient_restrictions = permit_sasl_authenticated, permit_mynetworks, check_relay_domains,    reject_unauth_destination
5smtpd_client_restrictions = permit_sasl_authenticated
打开/etc/postfix/master.cf,让postfix不要以chroot启动:
1# service type  private unpriv  chroot  wakeup  maxproc command + args
2#               (yes)   (yes)   (yes)   (never) (100)
3# ==========================================================================
4smtp      inet  n       -       n       -       -       smtpd -v
重启SASL Daemon:
1$ /etc/init.d/saslauthd restart
跑起来后,可以用
1# /usr/sbin/testsaslauthd -u username -p password
来测试saslauthd是否正常运作。参数输入的是登录所用的用户名和密码。 重新启动postfix:
1$ /etc/init.d/postfix restart
2.3. 安装dovecot
1apt install dovecot-core dovecot-pop3d
2.4. Thunderbird与用户配置
Thunderbird是一个流行的开源邮件客户端。本实验中,我们可以用它来查看或收发邮件。 首先,安装Thunderbird:
1# apt install thunderbird
安装好后,启动Thunderbird。输入你的名字、邮箱地址和口令。名字可以随便取,邮箱地址的格式是:系统用户名@主机名。口令是登录口令。
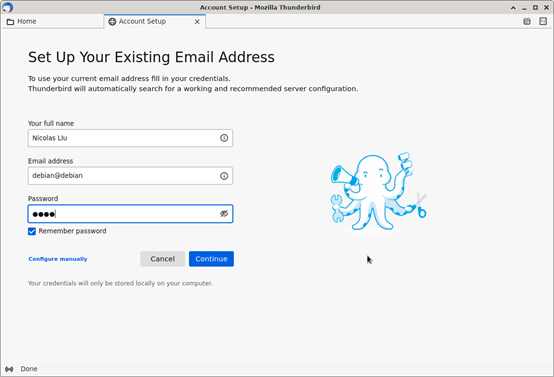
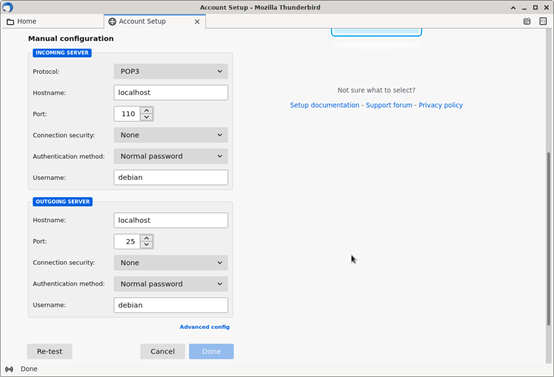
输入完成后,不要着急点Continue,而是点击Configure manually,需要按如图所示修改一些信息。这里的用户名即你的登录用户名,千万不要用邮箱地址,否则是无法正常收发邮件的。
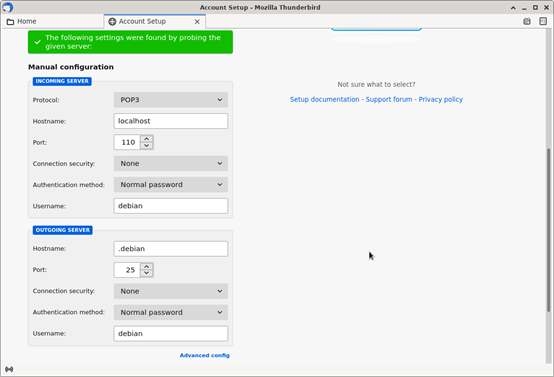
输入完成后,点击Re-test,如果信息无误,则会在上方现实绿色的框。
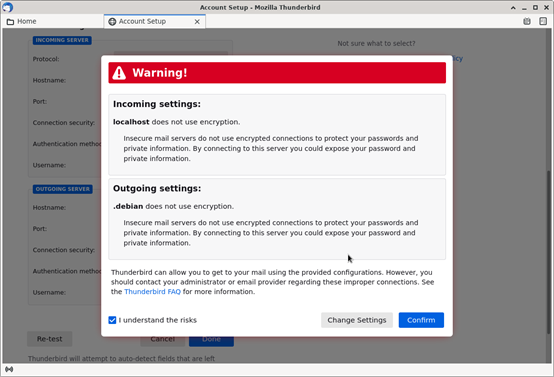
点击Done,之后Thunderbird会出现一个警告对话框,提醒你邮件服务器没有使用加密,会不安全。本次实验的交互都是明文传输,自然是不加密的,所以选中下面的“I understand the risks“后点击Confirm即可。
至此,Thunderbird配置大功告成。
配置Thunderbird后,使用它进行收发邮件。发件人和收件人均设置为当前账户邮箱地址即可,或者也可以新建系统用户,发件人和收件人使用不同的用户的邮箱地址。